Speaking from minimal cooking experience, why is this called a reverse sear? Is a non-reverse sear where you sear the outside first and then cook the inside afterward? What makes one of these a better technique?
I think it's called a reverse sear because the 'sear' step happens second--after the low-and-slow cooking--whereas it's a more common technique in cooking to start with the high heat to get the browning, and then lower the temperature.
Note that bacteria grow faster in hotter temperatures, until you reach the temperature where they die. (125°F, one of the temperatures mentioned in the article, is not hot enough to kill bacteria, and is thus one of the worst parts of the Danger Zone.) For large cuts of meat like a steak, you're mostly worried about stuff that's on the outside of it, and so a quick sear at a high temperature will kill stuff that's on the outside, and then you can comfortably cook at a lower temperature. My best guess is this is not a major problem at the times discussed here (30 minutes in the danger zone is within USDA guidelines) but probably was a worse idea when food safety was worse. Also note that when you put the steak in the oven, the oven temperature will be safe, in a way that means you don't need to be worried about the outside or contamination from the oven.
[As mentioned in a linked article, the commonly stated justification was to "lock in the juices", which isn't true, but it wouldn't surprise me if food safety was the actual impetus behind that advice.]
[[edit: I should also note that lots of recipes, like stew, start off with something that you want to fry (cook at temperatures higher than water boils at) and then later add something that you want to boil or steam (cook at water's boiling temperature). It is way easier to fry the meat and then add it to the boiling water than it is to boil the stew for a while, separate out the meat, and then fry it at the end.]]
Yes, traditionally people would sear and then put in the oven so the "reverse" in "reverse sear" is alluding to the fact that you're switching the order by going oven first and sear second.
Some other comments:
- I've never heard anything about the origin of the reverse sear being related to food safety, or better food safety is part of the reason to use it now.
- Not that Vanvier is saying anything in conflict with this, but since food safety was brought up I want to say that food safety thing with chicken (as an example) is kinda annoying. I think this video does a good job explaining it.
Basically, you want to kill salmonella and other bacteria. The heat needed to accomplish that is a function of both temperature and time, not just temperature. See page 37 of this USDA guide. At 165℉ salmonella is killed instantly. At 160℉ it takes 13.7 seconds. At 155℉ it takes 44.2 seconds.
Conventional wisdom says that you need to cook it to 165℉ to be safe, but that's just the guidelines being dumbed down because nuance leads to mistakes. In reality you can (and probably should!) cook it to a lower temperature if you hold it there long enough. - To me, the big reason to reverse sear rather than to the traditional sear-then-finish-in-the-oven is because of the better browning you get with the reverse sear. After taking it out of the oven with the reverse sear, the exterior is nice and dry, and since moisture is the enemy of browning, this dryness helps you get particularly good browning.
The other thing is that for physics reasons I don't quite understand, the reverse sear is supposed to get you more even cooking with less of a temperature gradient.
125°F, one of the temperatures mentioned in the article, is not hot enough to kill bacteria, and is thus one of the worst parts of the Danger Zone.
While it is slightly safer to cook at a slightly higher temperature, this is on the extreme edge of the danger zone and is probably a safe temperature to sous vide at for reasonable periods of time if you're confident about your thermometer, with the caveat that it won't pasturize the inside of the meat (although we're usually more worried about the outside).
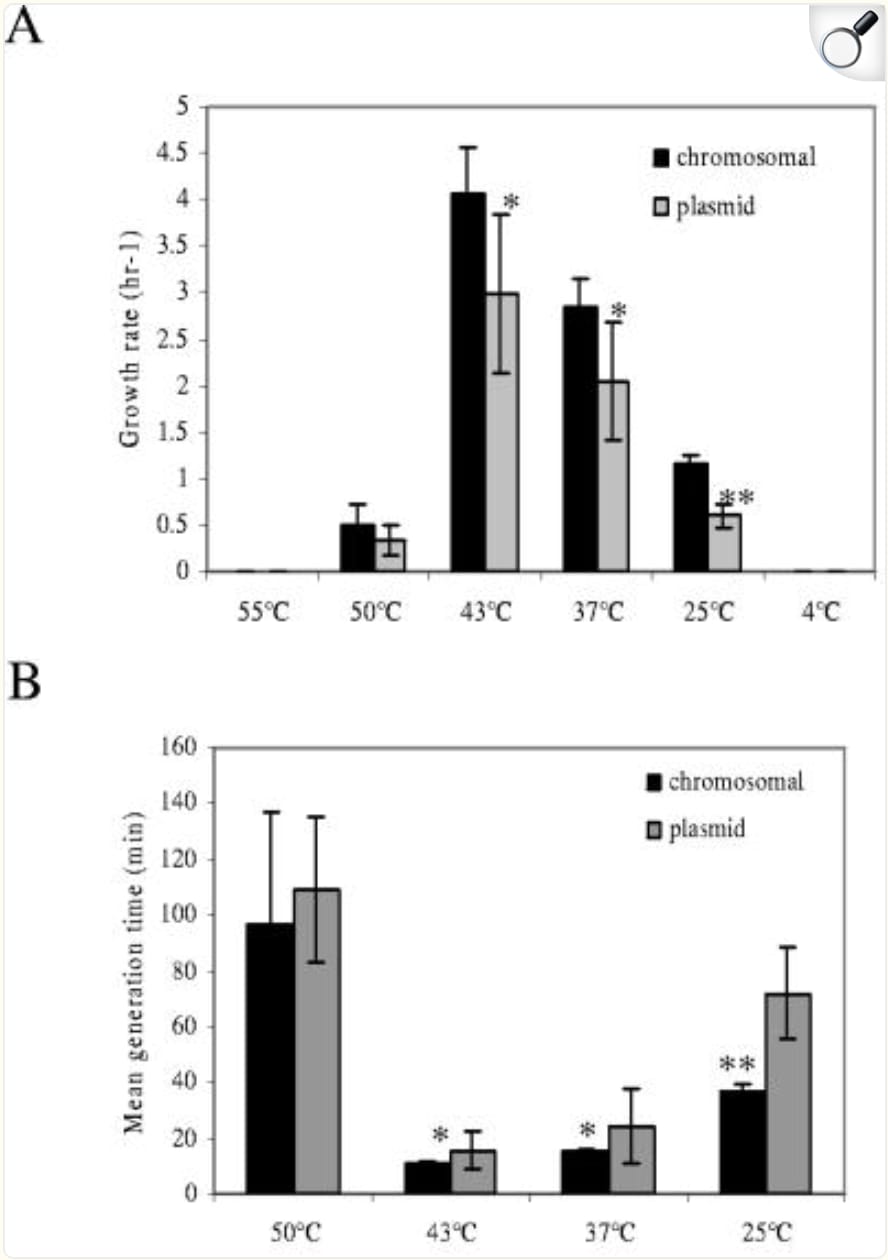
Douglas Baldwin suggests cooking at 130°F because one type of bacteria (Clostridium perfringens) can keep multiplying up to 126.1°F, but if you look at the growth rate in more detail, it's already growing very slowly at 50°C (~122°F), around 1/6th of the rate at the worst temperature (~109°F).
[As mentioned in a linked article, the commonly stated justification was to "lock in the juices", which isn't true, but it wouldn't surprise me if food safety was the actual impetus behind that advice.]
I actually think there is an important element of truth to the idea that searing locks in the juices. This video discusses it.
The idea is that no, searing doesn't lock in the juices that are inside the meat. However, the perception of juiciness is subjective and not just dependent on the actual juice in the meat. A big part of what makes you perceive something as juicy is how much it makes your mouth water, and searing does seem to make your mouth water a lot more.
I don't cook a lot of meat but this post inspired me to try applying this to potatoes. My current process for making herb fried potatoes is
- dice them
- cold water rinse
- toss with olive oil and dried herbs
- fry in iron skillet for half an hour, stirring frequently
this produces highly variable results, often over-charring the outsides by the time the inside is cooked. sometimes it comes out amazing, with the outside dark brown and the insides cooked and the herbs not burned but beyond "lower heat, stir more", I haven't been able to figure out what I was doing wrong.
After talking to opus about this a bit, I'm going to try boiling them (to cook the insides), then frying (to cook the outside). Hopefully this works more reliably than my current method (and maybe even faster too!)
I'll report back tomorrow when my potatoes arrive.
That's great to hear!
One thing I've heard is that for crispy outsides, after parcooking you want to shake 'em up aggressively so that there's a pasty substance on the outside like in this image. It provides more surface area for browning.
:max_bytes(150000):strip_icc()/__opt__aboutcom__coeus__resources__content_migration__serious_eats__seriouseats.com__images__2016__11__20161201-crispy-roast-potatoes-23-138844820d584e2ba1049499129f1a2b.jpg)
This post from Serious Eats has some other tips that you might be interested in.
Okay, so, reporting back! Here's what I did
- boiled for about 8 minutes
- left to sit in the colander for a few minutes
- shaken in colander on your advice to rough up the surface
- placed into an iron skillet along with olive oil and herbs
- fried while stirring frequently for maybe 20 minutes (not super exact, I didn't time this part)
And... despite some issues, they were very nearly the best potatoes I've ever made! Perfectly soft and melty inside, better than the best outcome I've had with the regular frying method. Not quite crisped enough on the outside, but that's because I made a mistake and ignored Opus's advice to put the spices in at the end. (Because the spices were in there from the start, I had to take the potatoes out of the pan before they were really done crisping, otherwise the spices would have burned.) But ohh the insides were so good, I was snacking on them while I prepared the rest of the food.
I'll try again tomorrow and see how big a difference fixing the spices makes.
I did this twice more, both times adding the spices at the end. It makes a huge difference! Instead of having a vague "paprika and rosemary taste" hidden behind layers of char, they actually taste bright and, well, like themselves. (A bit too much so in fact; my spice usage is calibrated to the old technique and I need to use less.) The third time I tried mixing the salt into the oil while it was frying and I found that improved the result (salt doesn't burn, but it does need time to dissolve and permeate the food).
That makes sense. Yeah from what I understand spices vary in how much time they can spend being sauteed. Ground spices have more surface area exposed and so will burn faster.
I've heard and experienced that freshly ground spices are notably better than pre-ground. It's relatively easy to do in a mortar and pestle or with a spice grinder. And sometimes it's good to dry roast them before grounding in order to "wake them up".
There are some other things that I wanted to say but struggled to fit in to the OP. I'll mention them here (in a rather brain-dumpy manner):
- I think an important question is, like, why is it important to understand these things when you can just google a recipe for any given food item you're cooking? The recipe will tell you exactly what to do and following those instructions isn't exactly rocket science.
Well, the words aren't really coming to me here but nevertheless, I'll give it an initial stab. 1) Often times you'll need to improvise and do things different from what the recipe says. 2) Sometimes you might want to cook something without a recipe. - When I said that this stuff is something you could learn in minutes-to-hours rather than days-to-weeks, I should probably clarify some things. I think a lot of learning does still happen at the days-to-weeks point in the timeline. What I mean is that I think the 80-20 principle applies and that in the minutes-to-hours phase, I expect that a very useful and worthwhile of learning will take place.
- When I propose that the benefit is large, to be clear, it's because I'm multiplying a relatively small amount of utility across a pretty large period of time. When you improve you enjoy your meal a bit more than you otherwise would I don't think that's yielding a massive amount of utilons. But when you eat three meals a day, seven days a week, 365 days a year... it adds up. Technology could end up changing this though.
- Even if you currently are someone who currently doesn't get much utility out of eating, I think that can change for reasons similar to how someone who doesn't appreciate art can learn to appreciate art and subsequently get a lot of joy out of art. And since we eat every day, learning to appreciate food seems plausibly worthwhile. Hm, maybe I'll write a post about that some time. For now I'll note that this path also has downsides. Off the top of my head: being tempted to spend more time cooking than you should, to eat less healthily than you should, to spend more money than you should, not enjoying food you otherwise would.
- I worry that I wasn't clear enough about the fact that I don't think the goals of a crispy exterior and tender interior are as common as... I made them sound? The important point is just that they are relatively common, common enough that if there's a technique for accomplishing those goals, that technique would be worth learning.
- I was hoping to spend more time explaining what exactly the adjacent techniques are, why I think they are adjacent to the reverse sear, and how you might apply them when improvising in the kitchen, but I kinda ran out of steam (no pun intended).
A wise woman once said: humans are not automatically strategic. I'd like to propose a way of being more strategic in the kitchen. I'd like to propose that you learn the reverse sear technique.
But not just the technique. Not just the thing you do to cook a steak. I'd like to propose that you learn about the underlying concepts. The problems that the reverse sear solves, how it solves them effectively, what techniques are adjacent to the reverse sear, and why it applies to things like Brussels sprouts, not just rib eyes.
I expect that learning these things will have a large ROI.
Goals
Steak
To start, consider a steak. When you buy it at the grocery store in it's raw form, it will look something like this:
You probably don't want to eat it in it's raw form though. You probably want to cook it.
That begs the question: how do you want to cook it? I think it's helpful to break this question down into two components:
To the first question, you probably want to cook it such that the interior is tender and juicy.
I suppose that not everyone falls into this camp though. I suppose that some people genuinely, authentically enjoy the inside of their steak most when it is tough and dry. And I suppose that other people[1] genuinely, authentically enjoy the inside of their steak most when it is raw and chewy. But for the sake of simplicity, I'm going to assume that your preferences are not unusual.
To expand on this question of what your goals are for the interior, you probably want this tender and juicy makeup to be uniform. You probably want to avoid gradients like these:
Ok. So what about the exterior? Well, that's pretty simple. I think most people want an exterior that is nicely browned like this:
Meat
But here's the thing: these goals are not unique to steak!
Consider chicken breasts. Chicken breasts are infamous for having their interior overcooked. There are plenty of monsters who like their steaks well done, but I think far fewer are pleased when the interior of their chicken breast is dry and chalky. People want this:
Not this:
And it's usually desirable to get some browning on the exterior as well.
The same is true for pork tenderloin, lamb chops, chicken cutlets, whole turkeys and many other cuts of meat. In fact, I'm having trouble coming up with counterexamples.
I guess one counterexample is when braising. When braising you don't necessarily want to brown the exterior. But then again, sometimes you do want to shred it, crisp it, and serve it with something. Think pulled pork on a sandwich or carnitas in a taco.
I guess there are a lot of situations like that where you don't necessarily want your meat to be browned or crispy. For example, sometimes you might prefer the simplicity of a tender poached chicken breast without any browning like this:
However, I think these are more so the exception than the rule. The rule is that people yearn for the sweet, savory, toasted complexity you get from the malliard reaction.
As for counterexamples to wanting a tender and juicy interior, the only one I can think of is jerky. In the case of jerky, dry and chewy really is the goal.
Vegetables
So far we've spent the whole post talking about meat. Now I want to branch further out and posit that these goals of 1) a tender and juicy interior and 2) a crisp, browned exterior often apply to vegetables as well.
As an easy first example, let's talk about Brussels sprouts. I've been trying to improve my ability to cook Brussels sprouts and in doing so, I take notes on Todoist. When I do I type out "brussel sprouts" and autocorrect keeps giving me these annoying red underlines. So now I have to capitalize the "B" and end with an "s", which seems counterintuitive...
Sorry I'm getting off track.
Brussels sprouts are a classic example of a food that is gross when prepared poorly and delicious when prepared properly. If the many food YouTubers I follow can be trusted, the story goes something like this:
Think about it, what looks more appetizing, this:
Or this:
Again, we want a tender interior alongside a crispy exterior.
Ok, what about broccoli?
Zucchini?
Cauliflower?
Malliard FTW!
Well, let me pump the breaks a little bit. I don't want to overstate my case. With meat I acknowledged that sometimes you prefer the simplicity of, for example, a poached chicken breast. With vegetables, I want to similarly acknowledge that sometimes something like steamed broccoli just hits the spot:
And for something like green beans, I would question how conducive they are to browning. I think I prefer my green beans to be steamed.
But, similar to the meat section, I think there's more wiggle room with respect to your goals for the exterior than with respect to your goals for the interior. Unless you're looking to channel your inner two year old, I'm not sure when you'd want your veggies to be mushy. I think you usually want a bright and tender, yet crisp interior.
It's worth pointing out that your goals for the interior of veggies vs meat are a little different. With meat we talked about juiciness. I wouldn't quite put it that way with veggies. With veggies, I guess there's some juiciness in green beans and corn but not in broccoli or Brussels sprouts.
Carbs
Continuing my argument, I think the broad goals of 1) a crispy exterior and 2) a tender interior often apply to carbs as well. Think about a nice, warm loaf of bread with a browned exterior and a steaming interior that is still slightly moist.
Or the contrast between the thick buttered exterior and soft interior of a thick slice of bread in a grilled cheese:
My favorite coffee shop bakes these muffins that have a deeply browned exterior and a creamy, almost pudding-like interior that I absolutely love:
I think a good french toast is similar. You want a creamy, custardy interior and a crisp exterior.
With potatoes, it's nice when you can get a crispy exterior that you can hear when you tap with a fork, and a creamy interior.
Even with pasta I think you sometimes want to have a crisp, browned exterior to contrast with the softer interior. People have recognized this with baked pasta dishes. For non-baked pasta dishes I think people are slowly catching on with dishes like spaghetti all'assassina:
There's also gnocchi.
Perhaps people in Asia have recognized this a long time ago with their stir fries. I'm thinking about a dish like pad see ew.
And fried rice. You want the grains to be ever so slightly toasted on the outside (but not enough to make the interior dry).
Paella takes this even further:
So, wrapping up, I argue that you often — but not always! — want 1) a crisp exterior and 2) a tender interior for the item you are cooking.
Technique
Ok, now let's talk about technique. The reverse sear technique is a great way to achieve those two goals of a crisp exterior and a tender interior. First I'll discuss the classic reverse sear technique and then some adjacent techniques.
I'm going to keep things relatively high level though. See this Serious Eats post for details.
Classic
To make explaining the classic reverse sear technique easier, let's assume we're applying it to a steak.
The classic reverse sear technique basically has two components:
There are other things to mention, but those two things are the essence of the technique, and I don't want to distract from the essence.
First, let's ask why we want to warm it up slowly. Any guesses? It could be fun to guess.
Ok, the reason is to prevent that temperature gradient that we mentioned earlier. To achieve a uniform doneness. When you warm it up quickly with too high a temperature, you get an undesirable gradient. Here's the image again:
So yeah, it's pretty simple: if you want to avoid that gradient, take your time and use a lower temperature.
If really want to go to an extreme to avoid that gradient you can sous vide it.
With sous vide you cook it in a water bath with water that is held at a consistent temperature. Like if you want your steak to be cooked to 125 degrees[2], you'd program the sous vide device thing to maintain a temperature of 125 degrees and after an hour or so, heat will flow from the warmer water bath into the colder meat until the meat is 125 degrees.
But in cooking it low and slow in an oven the temperature gradient you get is going to be quite small.
Ok, now for the second step of searing it in the pan. For this step we want high heat. Why do we want high heat? Well, for one, the malliard reaction that produces browning happens at around 300℉, so you need the pan to be at least that hot. The other thing is that the more time it spends in your hot pan, the more time there is for a temperature gradient to develop.
If you're extreme you could use a blowtorch or some other creative technique that Chris Young likes to make videos about, but in practice, just sear it in a hot pan.
Adjacent
There are various techniques that I would argue sit pretty close to the classic reverse sear technique.
For starters, consider this example of America's Test Kitchen recommending a reverse sear to cook chicken breast. I'd say it's a little bit adjacent to the classic technique for two reasons:
For an even less central example, consider For the Best Roasted Vegetables, Start with Steam, also from America's Test Kitchen. As the title describes, the video recommends steaming as a way of slowly cooking the interior.
For cabbage and fennel bulbs this takes the form of covering with tin foil and placing in an oven, because the food item has enough water content to release in the form of steam. For Brussels sprouts it doesn't, so the video recommends adding water to a pan and covering with a lid.
From there, to brown, for the cabbage and fennel bulbs you remove the tin foil and return to the oven on a higher temperature with some oil to roast. For the Brussels sprouts it's similar: remove the lid to get rid of the steam and water, add oil, and crank the heat.
Another example of something adjacent to the reverse sear, I'd argue, is the technique of par cooking and then crisping. For example, with potatoes you want to par cook them in boiling water and then sear with oil.
Notice that the exact method of the initial cook varies — uncovered in the oven for steak, covered in the oven for cabbage, covered in a pan with Brussels sprouts, boiling water for potatoes — but the idea is the same. The idea is that you want a low and slow technique to warm up the interior to the desired level of doneness as a precursor to the final sear.
Same with the final sear. The technique varies. Sometimes you're searing in a pan, sometimes in an oven, sometimes under a broiler, sometimes a frier, and if you're Chris Young, sometimes with a blow torch.
My hope is that understanding the concepts here will help you find places to apply them.
And Stoors.
Medium-rare is 130℉ and if you're targeting medium-rare you want the initial cook to be a bit below that since the temperature will rise a bit when you sear it.
I've always assumed that you can't use meat thermometers with thin cuts, and I'm really sad that I hadn't questioned or tested that assumption. I've seen reputable people on YouTube both use and recommend using meat thermometers on thin cuts, and I think that points strongly towards it being doable.
This is a good video on how to do so and what failure modes to avoid. And yeah, like I said in the post, it's even easier when your thermometer has multiple sensors; that way you get readings at each point and can use the lowest one.